Amazon Web Services
Amazon Web Services
For AWS customers, Event Store Cloud allows provisioning an EventStoreDB cluster in the same cloud. You can create a cluster in the same region to ensure the lowest latency.
Pre-requisites:
- You have an organization registered in Cloud console
- You can log in to the Cloud console as admin
- Your organization has at least one project
- You are the admin of the project
- You have access to create AWS resources in the AWS account of your organization
The provisioning process consists of three steps:
- Create a network in Event Store Cloud
- Provision the EventStoreDB instance or cluster
- Peer the new network with your own AWS network
Create a network
In the Event Store Cloud console, go to a project and switch to Networks. Then, click on the New network button.
Make sure to fill out the required information:
- Network name
- Cloud provider: AWS
- Region: choose the AWS region
- CIDR block: the new network address range
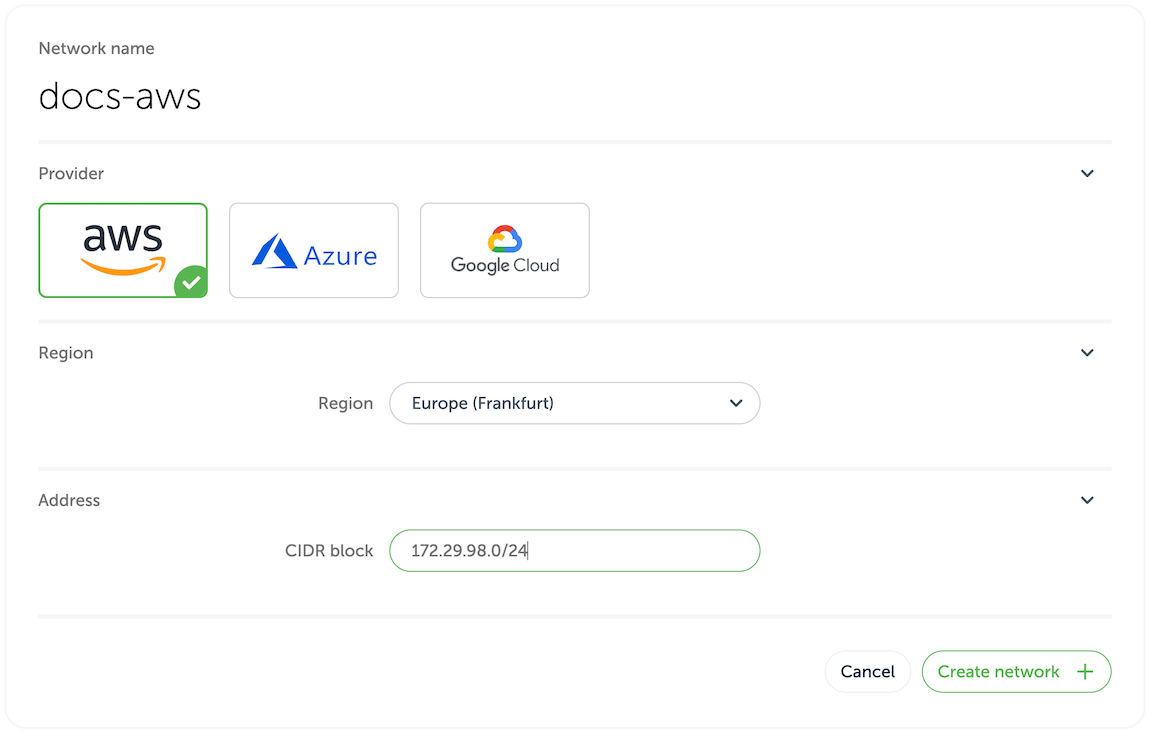
To establish a connection between the cluster network and your own cloud network, you'd need to peer them. Currently, Event Store Cloud only supports peering within the same region. Therefore, ensure that you choose the same region as your own cloud network.
The network address range should not overlap with the address range of other networks in the same region and with your own AWS network, which you will be peering with. As any other cloud network, the CIDR block needs to be within the range specified by RFC1918.
After specifying all the details, click on the Create network button. You will be brought back to the networks list where the new network will appear as being provisioned. The provisioning process in AWS might take up to five minutes. You'd need to click on the refresh button from time to time as the view won't update automatically.
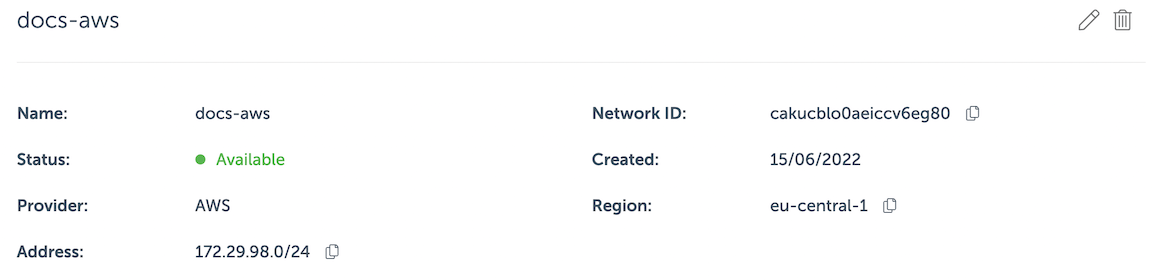
By clicking on the network in the list you can inspect the details like its name, status, region and address range.
Wait until the network becomes Active in the list before moving to the next step.
Deploy a managed instance
Within the project scope you can view EventStoreDB clusters for the project if you click on the Clusters menu. Initially, the cluster list is empty and you will only see the New cluster button.
When you click on the button, you get to the cluster creation form.
On the first part of the form you need to specify the new cluster name, the cloud provider (AWS) and the EventStoreDB version. Further, you need to choose whether to start server-side projections by default.
Projections impact on performance
Both system projections and user-defined projections produce new events. Carefully consider the impact of enabled projections on database performance. Please refer to the Performance impact section of the projections documentation to learn more.
The next section of the form allows choosing the instance size for cluster nodes. Use the provided instance size guidelines to choose the right size for your cluster. Note that the F1 size is using burstable VMs, which is not suitable for production use.
Vertical scaling
At this moment, it is not possible to change the cluster node instance size. You can still resize cluster instances by taking a backup and restoring it to a different cluster with larger or smaller instances.
Further, you need to specify the storage capacity. One disk kind is available at the moment, but you can change the disk size, IOPS and throughput. Since we allow customers to expand the storage size online without service interruptions, you can start with smaller storage and expand it when you need more capacity.
Note
The cloud console only allows for the creation of GP3 clusters, but for backwards compatibility purposes it is still possible to create a cluster with GP2 storage using tools such as the Terraform provider or Event Store Cloud CLI.
Next, choose the network provisioned previously from the list. All cluster nodes will be attached to that network.
You will get the monthly price for the selected cluster size down below in the form.
Finally, when you click on Create cluster, the provisioning process starts, and you will get a new cluster available after a few minutes.
Network peering
When the cluster provisioning process finishes, you get a new cluster (or single instance), which is connected to the network created in the first step. You won't be able to connect to the cluster since the network is not exposed to the Internet. In order to get access to the network and consequently to all the clusters in that network, you'd need to peer the Event Store Cloud network to your own AWS network. Normally, your AWS network would be also accessible by applications, which you want to connect to the new cloud EventStoreDB cluster.
Peering limitations
Currently, you can peer one Event Store Cloud network with only one AWS VPC on your account. We expect to lift this limitation in the future.
For this example, we'll use a VPC in AWS in the same region (eu-central-1).
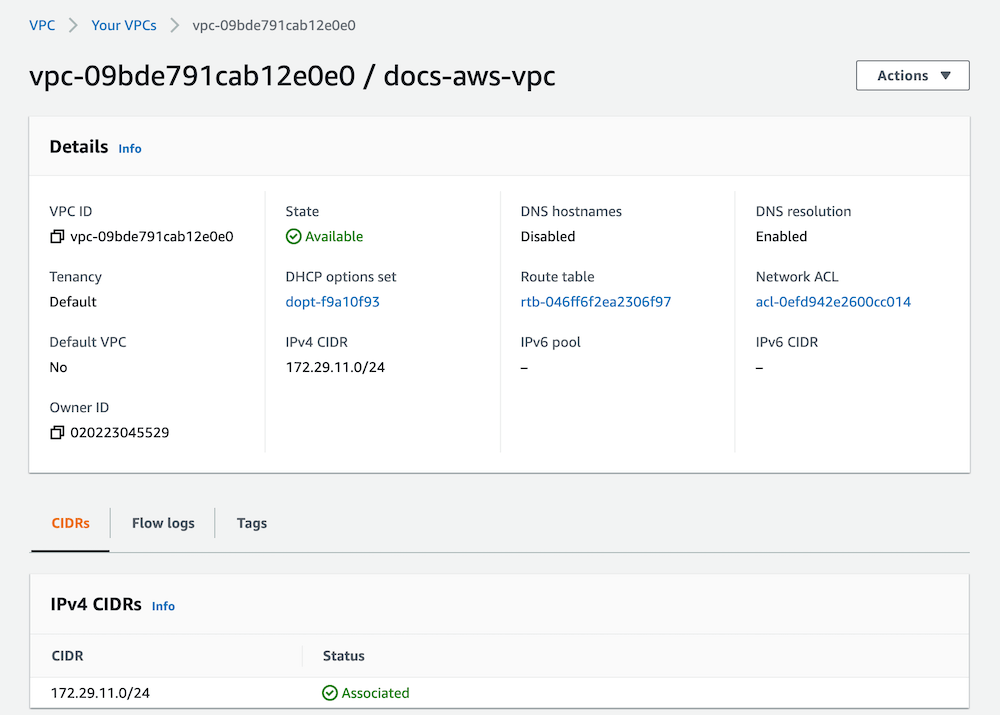
The network page provide us enough details to start the peering process. In Event Store Cloud console, while in the same project context as the new network and cluster, click on Peering under the Project menu, then click on New peering.
Then, give the new peering a name and select the network created earlier.

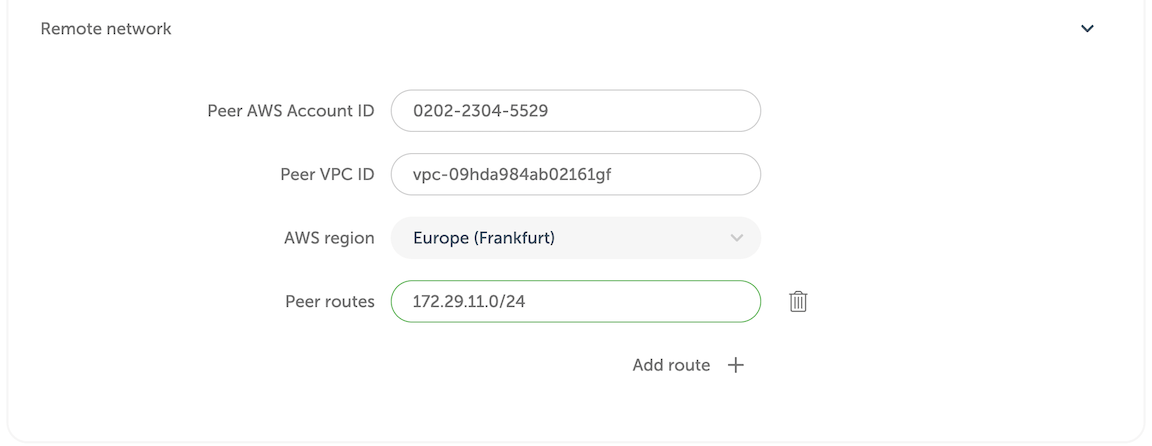
Then, you'd need to fill out the remaining fields, using the information from AWS VPC screen.
| Peering form | AWS terminology |
|---|---|
| Peer AWS Account ID | Owner ID |
| Peer VPC ID | VPC ID |
| AWS region | VPC region, cannot be changed |
| Peer routes | One or more IP ranges for the selected VPC |
You can specify more than one route if you, for example, want to peer a VPC with multiple subnets. However, the routed IP ranges must belong to subnets in the same region as the Event Store Cloud network.
When you click on the Create peering button, you'll be redirected to the peering list screen with the new peering resource being provisioned. After a little while, the status will change to Intiated. If the status doesn't change after 10 minutes, delete the peering and try again, ensuring the details were entered correctly. Mismatching network region and address range are most common reasons for the peering to not being provisioned properly.
When the peering is initiated, get back to AWS console and navigate to Virtual Private Cloud - Peering Connections list. There, you will see the incoming peering request.

Select the pending peering and click on Actions - Accept request. Validate the request details and ensure that all the details match the peering, which you can see in Event Store Cloud console. If everything is correct, click on the Yes, Accept button. After you get a confirmation, you will see the peering in AWS console to become Active. Now, you can get back to Event Store Cloud console, refresh the peering list to ensure that the pending record also changed its status to Active.
Now, although both networks are now connected, AWS doesn't create proper routes automatically. To finish the setup, open the AWS VPC details and click on the route table link, then on the Routes tab. There you'll see that the network has no route to the Event Store Cloud network, so you need to create one.
Click on Edit routes and then Add route. In the Destination, enter the CIDR of the Event Store Cloud network. For the Target, choose the Peering Connection option.
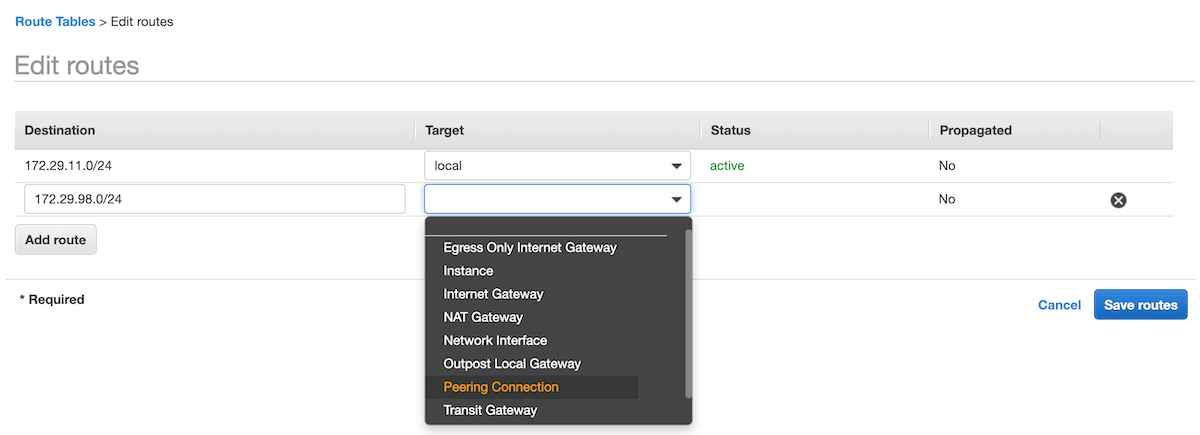
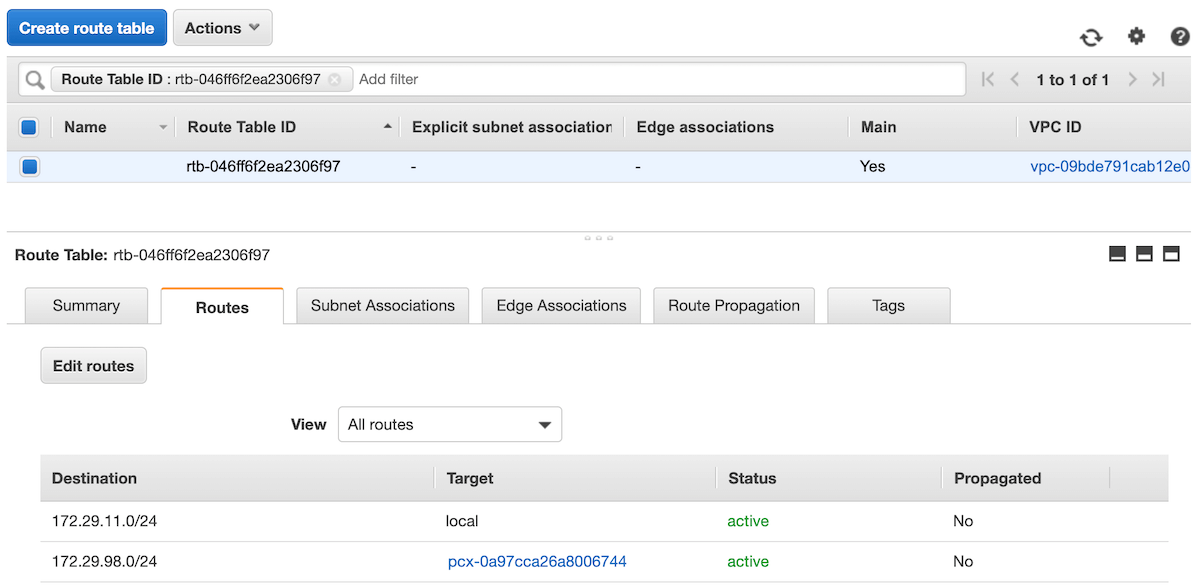
The list of available peering connections will pop up. Select the recently created peering from the list and click on Save routes. The route table would then look like shown on the screenshot below.
Peering issues
You might see the peering request getting stuck. There are several reasons for this to happen, like your cloud account quota or overlapping CIDR blocks. You can find all the necessary diagnostics in the Event Console in Event Store Cloud.
At this moment, you should be able to connect to the EventStoreDB cluster in the cloud from any VM, which is connected to your AWS VPC network.
If you are using one or more subnets associated to this VPC, make sure you update the routing table for all of them, not only on the main route table of the VPC.
Depending on your setup, you might already have a connection available from your local machine to the AWS VPC using a site-to-site VPN. If not, ask your AWS administrator about the connection details, which could be a Virtual Private Gateway or Client VPN Endpoint.
Next step
You are now ready to start using the new EventStoreDB cluster in the cloud. Follow to the Using the cloud cluster section to learn more.
Disk Types
GP2 to GP3 Migration
GP3 disk type provides better base performance for disks smaller 1TB, GP2 provides a minimum of 100 IOPS with burst balance, IOPS and throughput depend on the disk size. GP3 gives 3000 IOPS / 125MB/s throughput by default and provides an ability to configure it. There is no downtime or performance degradation during the migration.